So anyways, the original final boss and his castle. Gimmick can get annoying, but you better start to like it quickly, because there is so much of it.
Throughout the 6th Stratos, there are machines placed on certain masses that can heal your HP or TP, once per day. If you put in a certain item, it heals even more, but it heals enough anyways. Which helps when you want to explore a long time, but I didn't really use them on my first run through.
21 Floor:
Nothing out of the ordinary, as the only puzzle here is avoiding the FOE (Jedi) to reach the stairs.

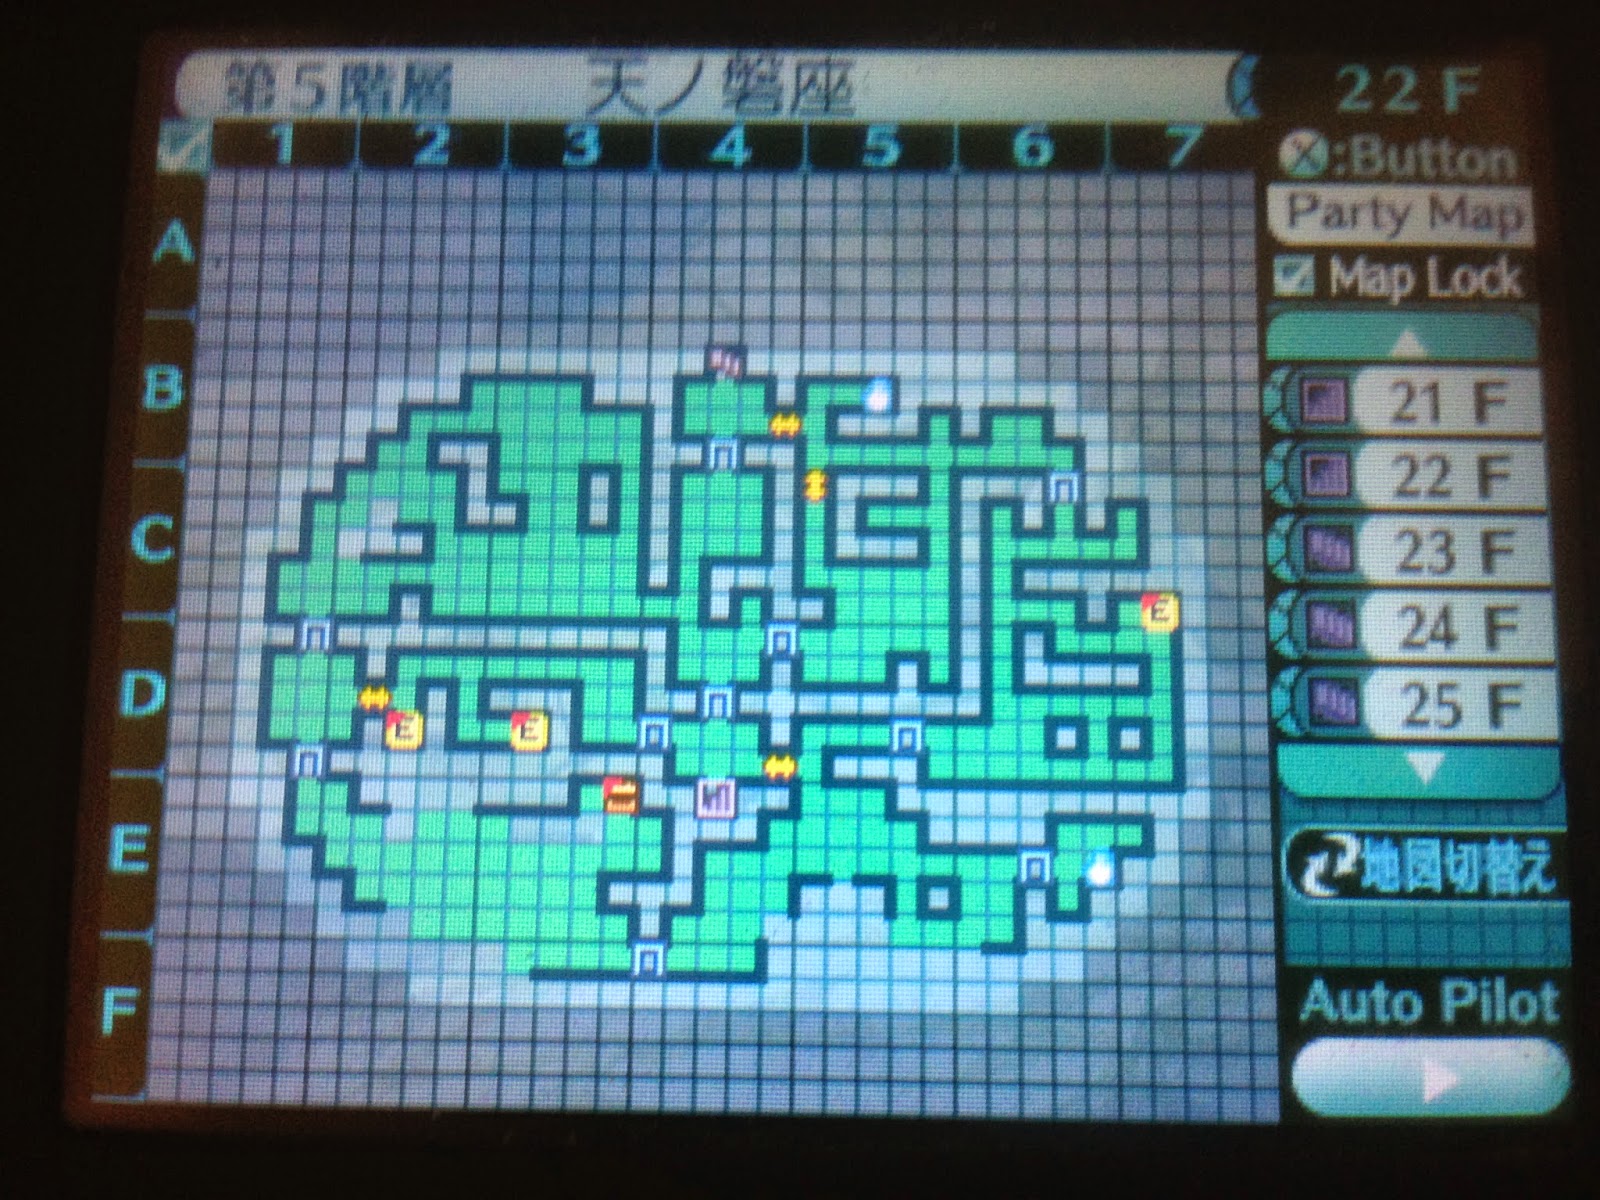
22th Floor:
Introduction to the main gimmick of the Stratos, a flying bomb. It moves 2 masses per movement, and whenever it lines up with your character (not including when the player is behind), it changes its direction while moving. When it hits a wall, FOE, or you, it explodes. It does 100 damage to your entire party if it explodes on you, but it will destroy any FOE it explodes on. You need to use it to get rid of the dark knight FOEs on this floor.
23th Floor:
You fight the boss Juggernaut on this floor, on the bottom of the map. On the central part, 3 spawning zones for the flying bombs exist and by luring them, you can get them to explode on Juggernaut. However, you have to have the bomb explode on any direction other than in front of Juggernaut, as he will swipe and destroy the bomb if the bomb is in front of him. After being hit once, he starts chasing the player when the player gets in a certain distance from him. After being hit 4 times, he stops moving and the bombs stop appearing. There is a healing/save zone near the entrance that you can go back to any time.

24th Floor:
As with the previous two floors, you need to use the flying bombs to get rid of the FOEs (flying saucer?) to avoid fighting them. But what is different here is that after a certain amount of steps, the FOE calls out new copies of itself. So if you take too much time in luring the bombs into the FOEs, you have to start over.

25th Floor:
And if you thought it was annoying enough trying to get rid of one set of FOEs at a time with the bombs, now you have to do it while all three types of FOEs are on the same floor. Avoiding Jedis while luring bombs onto the dark knights, all of that good stuff. Thankfully, only the left part of the map contains the bomb/FOE puzzle, so the right part of the map is a good opportunity to rest before the boss.

FOEs:
Crimson Swordsman
1. Slash to random targets 4~6 times + Attack Up
The Jedi we all know and love from the original game. In the original game, 1 was so powerful, it was able to destroy parties that made it to the 6th Stratos if the player was not careful.
It is still very strong in this game, but his attack routine is a lot more obvious, so it is not as bad.
For most of the battle, he will use 1. when he has no attack boost and then use his basic attack until the attack boost runs out. So generally, 1 -> Basic -> Basic -> Basic -> 1 -> Basic, etc. However, once his HP reaches a certain point, he will start attacking randomly. Needless to say, a boosted 1. is very painful.
His rare drop comes from defeating him in 5 turns, and thanks to his attack pattern, a easy but cheap way to defeat him and get his rare drop is to boost your luck stats as much as possible and just spam instant death/petrify moves. He does have quite a resistance to them, so you probably will need all the boost you can get (such as the +10 LUC meal).
Movement: Patrol (1 step per step in a certain area) -> Chase (1 step per step)
Rare Drop: Defeat in 5 turns

The Pitch Black Demon Knight
1. Slash + Blindess to entire party
2. Slash + Instant Death to entire party
As you might expect from his two skills, but he attacks in a way similar to the 4th Stratos boss.
On the first turn, he will use 2. Of course, it has very low accuracy and won't hit. Then, he will use 1. He doesn't use 1 twice in a row, so the next turn, he will use 2. if there is a character that is blinded (and thus cannot evade) on the row of that character. If there is no blinded character, he will use a Basic attack.
Similar to the Jedi, once his HP drops to a certain point, he will start to use 1 repeatedly instead of alternating.
Movement: None -> Chase (1 step per step) only when player gets in front of him
Rare Drop: Defeat with Head bind

The Silver Guardian
1. Full Bind to entire party
2. Fire to entire party
On every 4n+1 turn (1, 5, 9. etc), he uses 1. On the other turns, he uses 2. However, once his HP drops to a certain point, he starts to use his skills randomly.
However, if you have a Paladin with a high Arm Bind resistance + Fire Guard, you can defeat him just by using Basic attacks, as this FOE only causes damage through 2, a pure Fire attack. However, because he calls new copies of himself as time passes, there are certain parts of the map where you shouldn't fight him, unless you want to face an unlimited number of this guy at a time.
Regardless, as long as you keep your Paladin from being binded, he is quite easy compared to the other two FOEs.
Movement: Patrol (1 step per step) -> Chase (1 step per step) when and only when player is in the patrol route

Boss:
Juggernaut

1. Attack Boost on Juggernaut and entire party
2. Bash + Full Bind on entire party
3. Defensive boost (both elemental and physical)
4. Bash + Arm Bind + Spread
5. Pierce + Stab
6. Blind or Poison on entire party
7. Bash + elemental and physical defense down on entire party
8. Null + Remove all buffs on entire party
While he may be a mid-way boss like on the 3rd Stratos, he is just as hard as any Stratos boss. Thankfully, once you hit him 4 times with the flying bombs, you can get a back attack on him while he starts off with around only 60~70% of his original HP. He has a whole lot of HP, so it is suggested you do so.
Even more so than other bosses, you have to remember his movements and keep up with the turns. On the first turn and every other 4 turns, he uses 1. Then, for the next 4 turns, he uses Basic, 4, 5, 6, or 7, never using the same ones twice in a row. THEN, VERY IMPORTANT, but on the end of the 4th turn, if any of your characters has a buff, he will use 8. If he does so, he will then use 2 the next turn. Not only does it do heavy damage, but it also causes full binding on your entire party. Getting hit by this can cause decimation to your entire party.
If you hit him with an elemental attack, he might counter with 3 and boost his defensive stats.
Both 1 and 3's boost is fairly high, so it is best to dispel the buffs as soon as possible. Because it is important to remove buffs from both the enemy and your party, the Prince/Princess' Clearance skill (removes all buffs/debuffs on all) will be very useful.
Rare Drop: Defeat with Leg Bind
Overlord:

His first form's attacks are completely set in stone.
Turn 1: LRDA (Random status ailments on entire party)
Turn 2: VOID3 (Null on entire party)
Turn 3: MACV (Counter against physical attacks)
Turn 4: VOID2
Turn 5: AACV (Counter against elemental attacks)
Turn 6: VOID1
Turn 7: REPAIR (Heals 1000)
Turn 8 Onwards: VOID0
As the VOID's number drops, the attack becomes stronger. On top of that, because it does not have an element, there are very few ways to reduce the damage. On top of that, he will endlessly use it from the 8th turn onwards. In other words, you have to defeat him before time is up, avoiding the counters on their specific turns. Of course, you need to also avoid the LRDA on the first turn.

1.Bash on front row
2. Dispels debuffs + physical and elemental offensive boost
3. Slash on random targets 5 times
4. Fire on entire party + Head Bind
5. Ice on entire party + Arm Bind
6. Thunder on entire party + Leg Bind
7. Physical damage (?) + full offensive debuff + confusion on back row
8. Full defensive debuff + Confusion or Terror on entire party
The final boss of the original game (not counting hidden) and Ruler of the Skies. It took me 3 tries to defeat him, even with slight knowledge of his attack patterns. While none of his attacks are instant death, he summons little side enemies that you have to defeat or his attacks then become instant death-level. And that is the hardest part. Taking out those pesky objects while also doing damage to Overlord.
He has various phases he goes through.
On the first phase, he repeats doing nothing, 1., Basic. Once his HP drops to a certain point, he summons a Satellite Killer behind him and goes to phase 2.
For a couple of turns, the Satellite will use a Basic attack while Overlord uses his physical attacks. But then a Core will suddenly appear. When this Core appears, Overlord will start using his elemental attacks. For Phase 2, it will be Fire. When Overlord uses an elemental attack, the Satellite Killer will chase the attack, so you want to take out the Satellite before he does so. Then, after 3 turns? 4 turns? of using the elemental attack, there will be a narration and movement. The next turn, Overlord will use 3. 3 hurts enough normally, but if you haven't taken out the Core by the time he uses it, the damage greatly increases to devastating numbers.
He moves to Phase 3 after using 3.
For Phase 3, he repeats doing nothing, 1, Basic, and 7. After doing enough damage, he summons TWO Satellite Killers and moves to Phase 4.
Phase 4 is similar to Phase 2, except he uses the Ice elemental attack. Of course, if you don't kill any of the Satellites, both will chase his attacks.
He moves to Phase 5 after using 3.
Phase 5 is doing nothing, 1, 8, Basic, 7 repeatedly until his HP reaches a certain point. He then summons two Satellite Killers and moves to Phase 6.
Phase 6 is now the Thunder element. He moves to Phase 7 after using 3.
Phase 7 is pretty much the same as Phase 5, but after using 7, he reveals the Core without summoning any Satellites. However, the element used is now completely random. Of course, he eventually uses 3 and returns to the beginning of Phase 7 (which is same as 5).
Because of the randomness from Phase 7, it is best to try and take him down before he randomly starts shooting elements. There are no longer any Satellites, so you can focus on him better.
Because all of his elemental attacks have a side-effect, you should upgrade your Paladin's elemental guards (or use Grimoires) so the guard negates, not absorb or reduce.
For me, I eventually had to use my Doctor Magus's and Paladin's Guard Break in the middle of the battle when my team started to fall apart. I also had to use my Ranger's Guard Break when I realized I could not take out the Satellite/Core in time. But I was somehow able to take him out before he reached the elemental part of Phase 7 and win on my 3rd try.
All parts of Overlord are weak against Thunder and Poison, for note.
No comments:
Post a Comment