
As it can't be helped because these last areas are part of the story climax, practically all of this post will contain important story spoilers.
Gladsheim Area 4 and 5
You learn that the secret Cell-destroying weapon that you were planning to use was actually going to destroy not only the evil monster at the bottom of the labyrinth, but it was also going to take out the city and everything nearby too.
So of course, your party refuses to use the weapon and try to find another way. However, because not using the weapon practically meant denying MIKE's reason for existence, his CPU or whatever couldn't take it and went berserk. And he tries to force Frederica into a brainwashing machine and kill the rest of the party.
I did not take an image of Area 4, but it is an absolute plain. Similar to Floor 18. There are absolutely no FOEs (according to MIKE, he took care of them). After the event in which MIKE goes berserk, the boss Gimley appears. Of course, you are allowed to go back to the city and prepare.
While it depends on your level, the greatest chance of game over is if your front row is destroyed by Air Shot + some attack. Air Shot is used one turn and it strikes at the end of the next, meaning your front row will need to survive both attacks.
In the first half of battle, Gimley uses Flamethrower on your entire party repeatedly. Fire Guard should be used to keep your party from falling.
After his HP is lowered, he switches to using Caterpillar Press and Mustard Gas. Both hit your entire party, with Press being physical and Gas causing various status ailments, which includes Paralysis and Confusion (which could mess up your cycle).


MIKE forcibly tries to launch the weapon of mass destruction by himself, giving you a limit of 50 turns to get to him and defeat him. If at any time, the counter reaches 0, it is Game Over.
You can not return back to the city either.
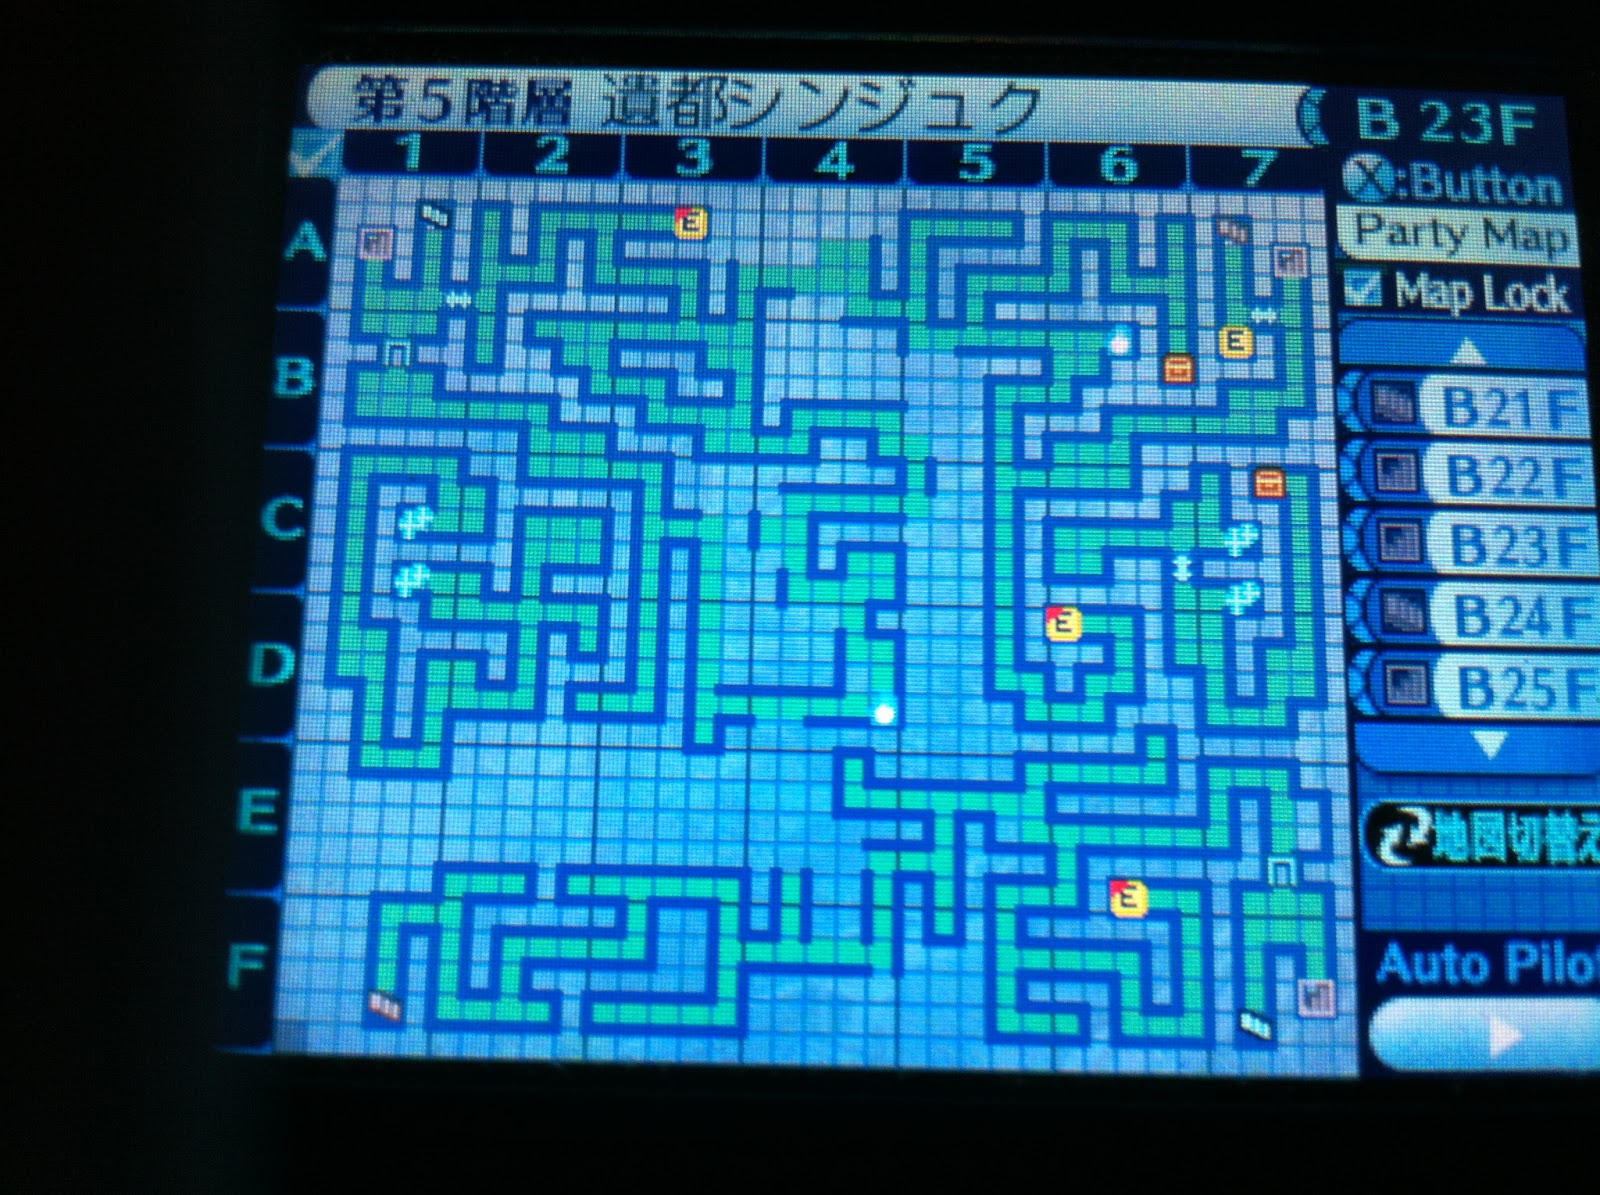
As you can see from the map, if you go straight forward, you will have over 30 turns left for MIKE. However, you also have to take out several FOEs to get there, meaning you will have to use TP.
If you take the detour, you have less than 20 turns, but you are able to avoid the FOEs.
The FOEs themselves (the picture at the very top) are a different model of the shellfish(?) enemy.
Battle-wise, they do not pose much of a challenge either.
They only have one skill, which does smash damage + stun to a row. (As your party lacks physical attackers with that element, it might be nice to Grimoire the skill?)
Movement: No movement until they notice you. Afterwards, 1 step per step towards you.

M.I.K.E.
You fight this robot, but to be honest, MIKE actually seems to be in the terminal in the background, not this robot.
Like other machines, he is weak to Electricity.
His elemental attacks are all electric, so Shock Guard will be your key this time.
Apparently, he seems to have Counter moves, but I personally never saw him use those moves. However, the Counters are all electric too, so Shock Guard can block it. However, Shock Guard only blocks the first time, so be very careful.
After using a certain skill (piercing physical), he overheats. In this state, all of your attacks do a whole lot more damage, so you should use this turn to deal as much damage as possible.
However, shortly after overheating, he uses All Delete, which deals heavy void damage to your entire party. He also recovers from Overheat after using it.


Upon clearing Gladsheim 4, you chase after the head of the city into the 5th level, floors 21 to 25.
And it gets complicated.
And as people who have played the first game knows, these floors take place in the ruin of Shinjuku. In other words, Japan and the ruins of the time period Frederica came from.
Lots of routes, many leading to dead ends with nothing. On top of that, plenty of FOEs, including ones where you have to watch their movement in order to get pass them without fighting.
You have to use the elevators to move forward in the dungeon.


However, before you can even explore these areas, you have to get past the Bushido (Ice Swordsman Ren) and Curse Maker (Tlachtga)
As there are two enemies, it definitely follows logic that you focus and take one out at a time. Either are fine.
Tlachtga is in the back row, but is weak to every physical element. Both Highlander and Gunner can hit the back row without loss of damage. Taking her out removes the chances of you getting binded or weakened.
Ren is the attacker of the pair and taking her out will pretty much have you set for victory, as Tlachtga has very few methods of dealing damage and all of them hit one target only. However, Ren is resistant to all physical elements and greatly resistant to Ice. She is weak against Fire though, so it is still plenty possible to defeat her first.
On the turn after Ren enters her stance, she will hit your party with Hyosetsu that deals heavy Ice damage to your entire party. If you make sure to use Freeze Guard, there will be no problem. She also has several physical moves, but using Parry will keep you from receiving fatal damage.
However, in case you are binded by Tlachtga, you should bring along items. Simon can also remove binds, but he is also in danger of head binding.
After doing enough damage, Ren starts using Ibuki which heals 1500 to both her and Tlachtga. Just keep doing damage until you defeat one.
If you do damage to Tlachtga, be sure you finish her off as quickly as possible, because her only damaging skill is Pain Trade, which does more damage as her HP drops. And considering how much HP a boss has, that skill can take out your Paladin in one hit.


FOEs
Bone Dragon that Brings Death
He has an incredible amount of HP, but in return, he also has weakness to every element except Electric. However, he uses this high HP, low defense characteristic against you with his Curse Gaze, which casts Curse on one target. Since he has so many weaknesses, if he Curses you before you attack, you will do large damage to him and then kill yourself from the Curse.
Other than that, he was only one other skill, but this skill is the main reason this FOE is hard. His Crunch skill does massive damage to your entire party. And once his HP reaches a certain level, he starts using it over and over again.
Movement: Circles an area. If you enter battle in his patrol area, he will notice you and move 2 step per turn(?) towards you. He returns to patrolling when you exit battle.

Ice Scissors
The ice version. As his appearance and name might hint, he uses Ice moves against you, so a negating Freeze Guard works wonders. However, unfortunately, he still has a move that does heavy physical damage to a row, so you aren't completely safe.
He seems to always use one of his Ice moves on the first turn, which is your chance to set up.
Movement: Stands still until you get close and he notices you. Upon noticing you, he moves 2 steps per step towards you. When you leave the area, he goes to the nearest harvest area and stops moving.
The harvest area he stops on will only give two special materials. One material is common and worthless and the other one is worth plenty of money and is required for a quest. Neither unlock weapons or items.

The Reaper of Souls
The bear FOE is back with longer hair. Like the previous bear FOEs, he charges up before attacking. If you constantly use disturbance bombs, he will usually repeat Energy Charge, allowing him to be an easy target. However, he does sometimes use his attack skills without charging, so you can't let your guard down. If you let him strike you after charging, your party will probably be decimated in an instant.
Movement: Moves in a line. Stops moving when you face it.
You have to use this movement characteristic to move through the dungeon without fighting him.

The King Under the Tree
I thought I took an image of this FOE, but it seems I didn't. Instead, please enjoy an image of Ren suffering from Poison?
Anyways, it is a yellow version of the elephant FOE.
He has only physical attacks, but they are either piercing or party-targeting, so your back row is far from safe. But his most dangerous skill causes Terror on your entire party. Needless to say, if your shield character or healer is unable to move, that will lead to your party's defeat.
Movement: Patrols an area, moving 1 step per step and resting 1 turn each step. He never notices you.

And finally, the boss of Floor 25 and the final boss of Classic Mode, the King of the World Tree
The World Tree absorbing the head of the city inside him, to continue living at all costs.
As the last boss/second last boss, he is a toughie. He has plenty of moves to use against you, including
-Eternity Tree (Renegeration - You can use an item to remove this buff)
-King's Aura (Removes all of your buffs - Rather, you can cast buffs to make him spend a turn using this)
-Cyclone Routes (Huge damage to entire party)
-Thousand Nails (Multiple damage to entire party)
-Hell Drain (Damage + Instant death on one target + Heals damage dealt x 2)
The two moves to watch out for is Cyclone Routes and King's Intimidation. Because he can remove all of your buffs in an instant, it is better to fight lowering his stats than increasing yours. However, the story party lacks those type of moves, so you will have to get some enemy skills inside Grimoires.
The biggest key to victory is your ability to survive Cyclone Routes. If you can survive this, it becomes that much easier to defeat this boss. Lowering his attack, increasing your defense, buying better armor.

In Story, you will have to defeat Forest Cell as the last boss, after defeating the King.
After Gladsheim 5, You will unlock a teleportation device that leads you straight to Floor 30, where you go to directly fight him.
However, there is no way the game would force you to defeat him at his full strength, so don't worry.

You actually fight him twice in a row.
The first time, you throw a virus on Cell, which lowers his HP to the red zone. In this battle, he uses only a few of his moves. Mostly physical, he occasionally uses his party-targeting elemental attacks.
It seems he uses Explode (Fire, party-targeting) on the 2nd turn, so it is easy to prepare.
After defeat him, he comes back alive for the second battle. Shirara comes along and sacrifices her body to possess your party's weapons, which massively boosts your attack power.
This battle, Cell is at full power, though his attacks seem to do less damage than it normally does. His HP also is the full 90000, but all of your attacks do far more damage thanks to Shirara, so it actually doesn't feel like 90000.
However, despite all of this, he does use all of his skills now, which includes Necrosis, which he uses on the first turn and deals instant death to your entire party. The chances of it working are low, but you probably will still lose one or two characters.


After defeating Cell, you will enter credits and are allowed to continue with the game, where you can now explore Floors 26-30 and fight the true Cell.
Also, Shirara is back from the dead. Why? No reason.
PS: The credits show Shirara without her hood! This does not happen in-game, so be sure to watch out for it!
Next time, Dragons and other bosses and getting to Forest Cell.
No comments:
Post a Comment